Veraset Documentation
Privacy-protecting location data, delivered daily.
Creating Location Groups
This guide explains how to build Location Groups, custom point of interest collections that you can use when running data extractions.
1. Accessing the Location Group Builder
There are two ways to begin creating a Location Group:
- From Quick Actions: On the Orchestrator homepage, click on Create Location Group under the Quick Actions bar.
- From the Location Group List: Navigate to the Location Groups list (via the left-hand navigation menu) and click the + New Group button in the top right corner.
Once you are on the map view, click the Add POIs with button to reveal the three methods for adding locations.
2. Method 1: Use Veraset's POI Database (Search)
This is the easiest way to find and add pre-existing Points of Interest.

- Click Add POIs with and select Veraset's POIs. This will open the Veraset POI Builder.
- In the search bar, enter a search term, such as a brand name, category, or keyword (e.g., "Golf Courses").
- The results will show matches for location names, street addresses, and corresponding NAICS codes or Subcategories.
- To narrow your search, click on any of the filters (e.g., Brand, City, State, Sub Category) at the top of the results list.
- For example, you can click on State and select Florida.
- After applying filters, the map and results will update (e.g., showing 2,744 POIs found for "Golf Courses and Country Clubs" in Florida).
- Click Confirm to load all the selected POIs onto the map.
3. Method 2: Upload Locations (CSV/JSON) or Use AI Assist
This method allows you to use your own data or generate locations using CSV, JSON, with optional AI assistance.
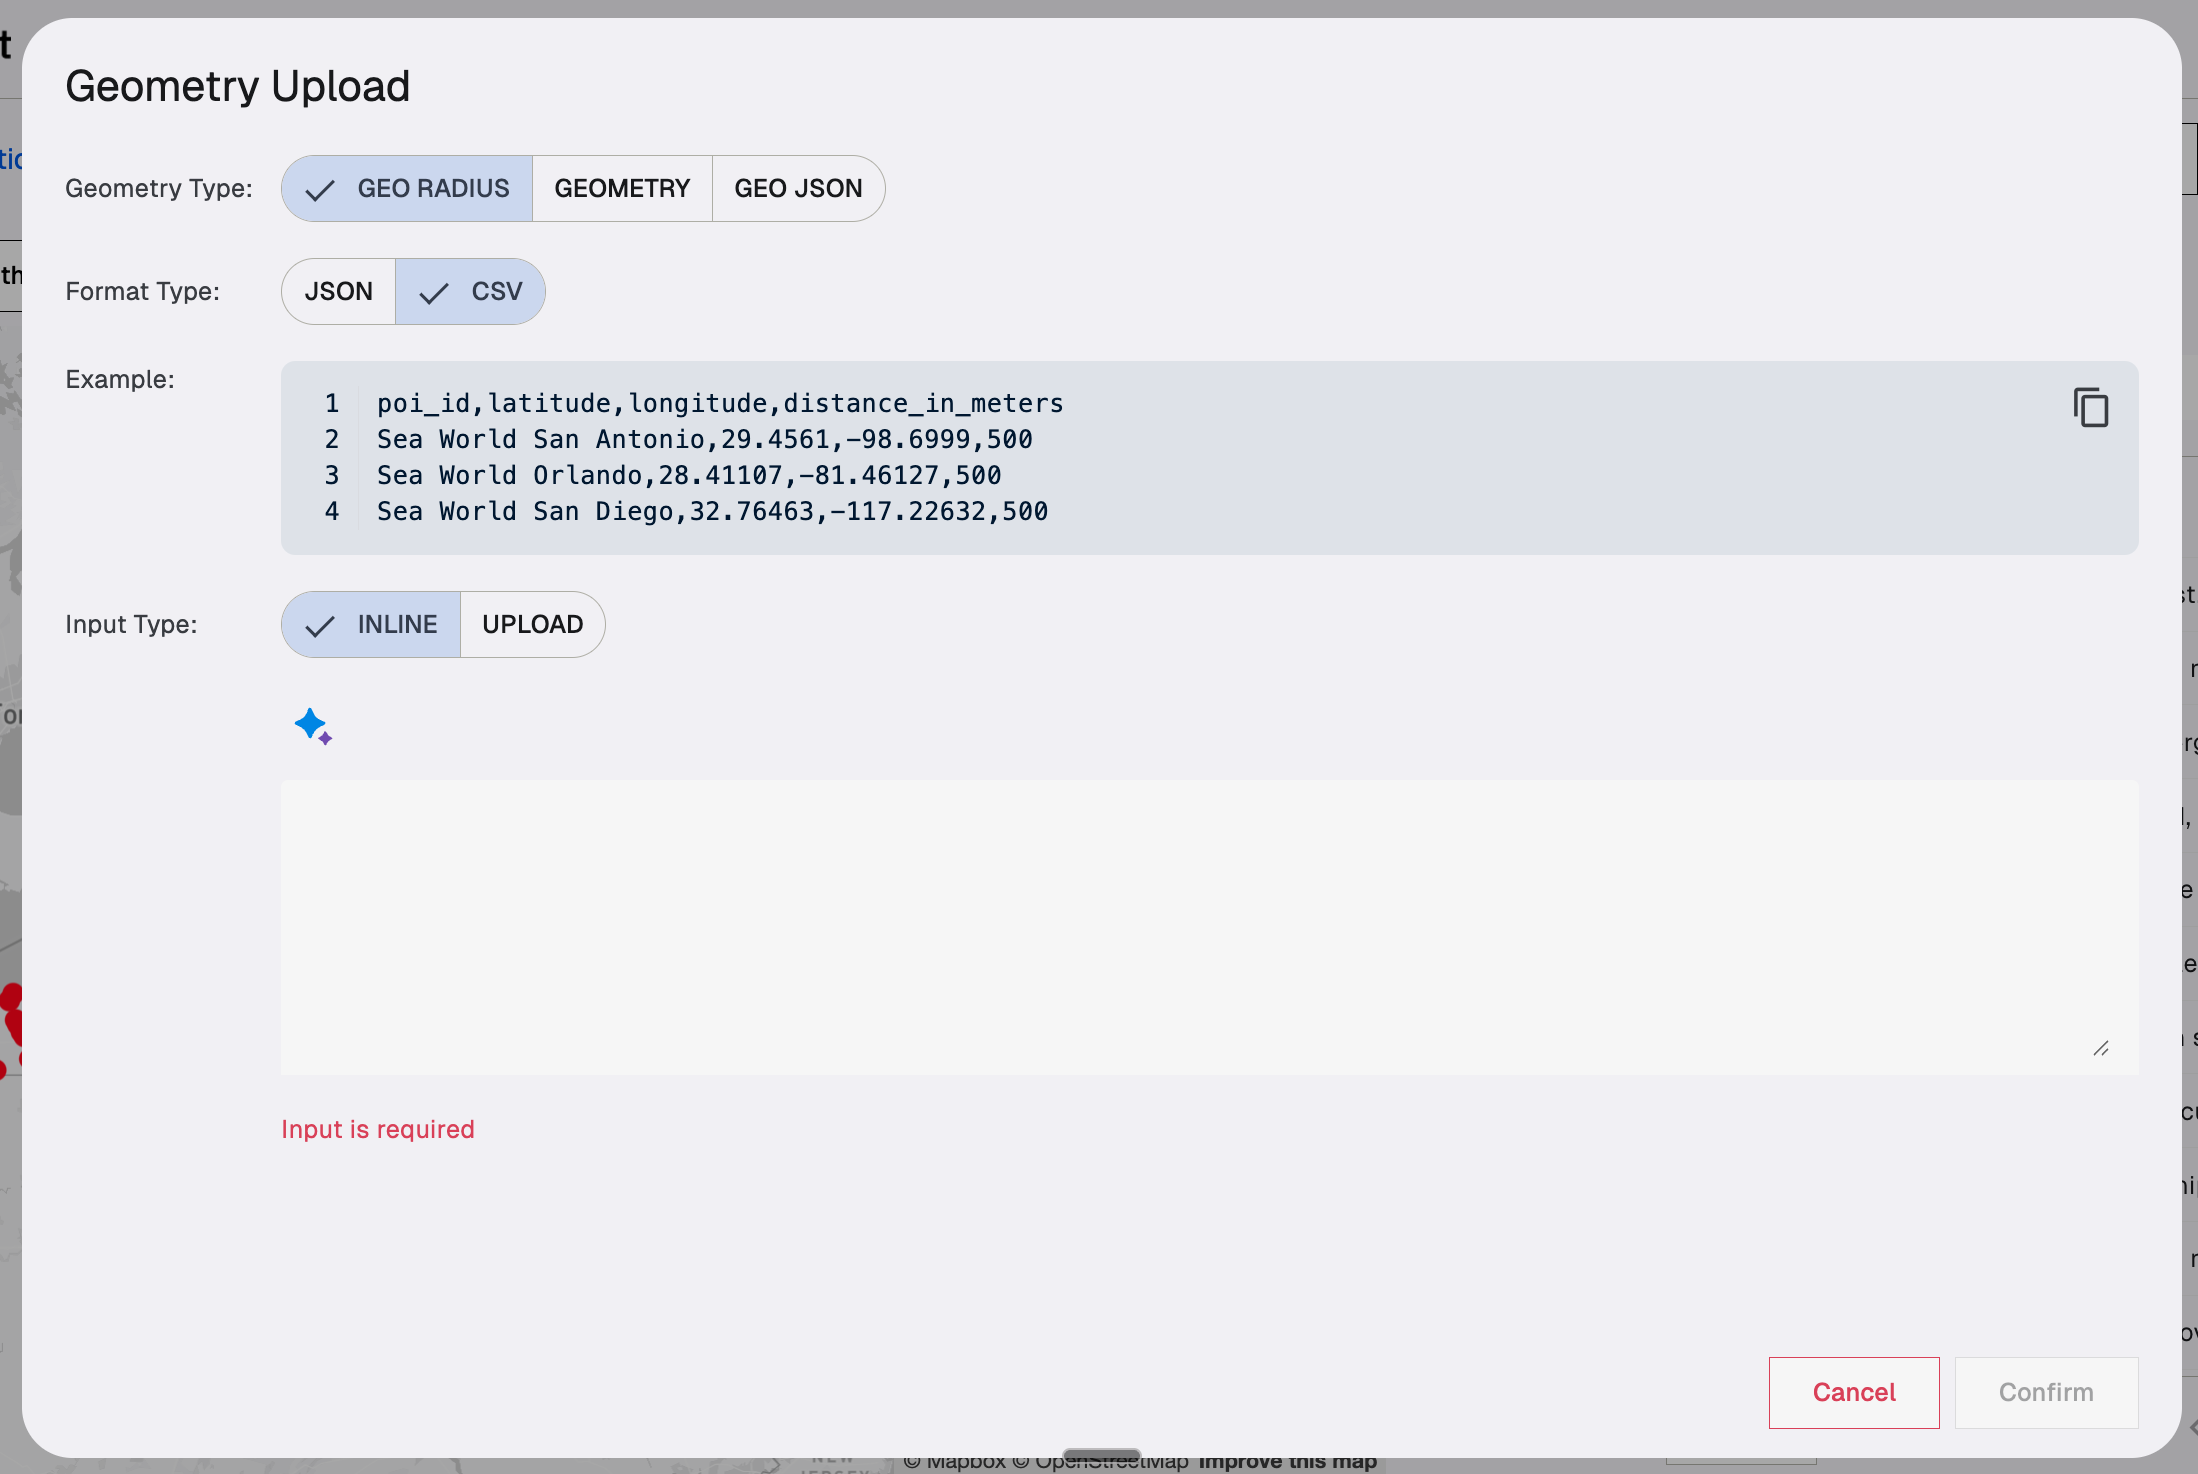
- Click Add POIs with and select Upload Locations. This will open the Geometry Upload window.
- You can select the Format Type (CSV or JSON) and Geometry Type (GEO_RADIUS or GEO_JSON). An example of the required format will be displayed.
- You have two input options:
- Upload: Click the Upload button to select a CSV or JSON file from your computer.
- Inline/AI Assist: Click the Inline tab to manually enter data or use the Ask AI bar to generate a set of locations.
- Example AI Prompt: "3 golf courses on Long Island"
- The AI-generated locations will appear in the input box in the correct CSV format.
- Click Confirm to add the locations to your Location Group.
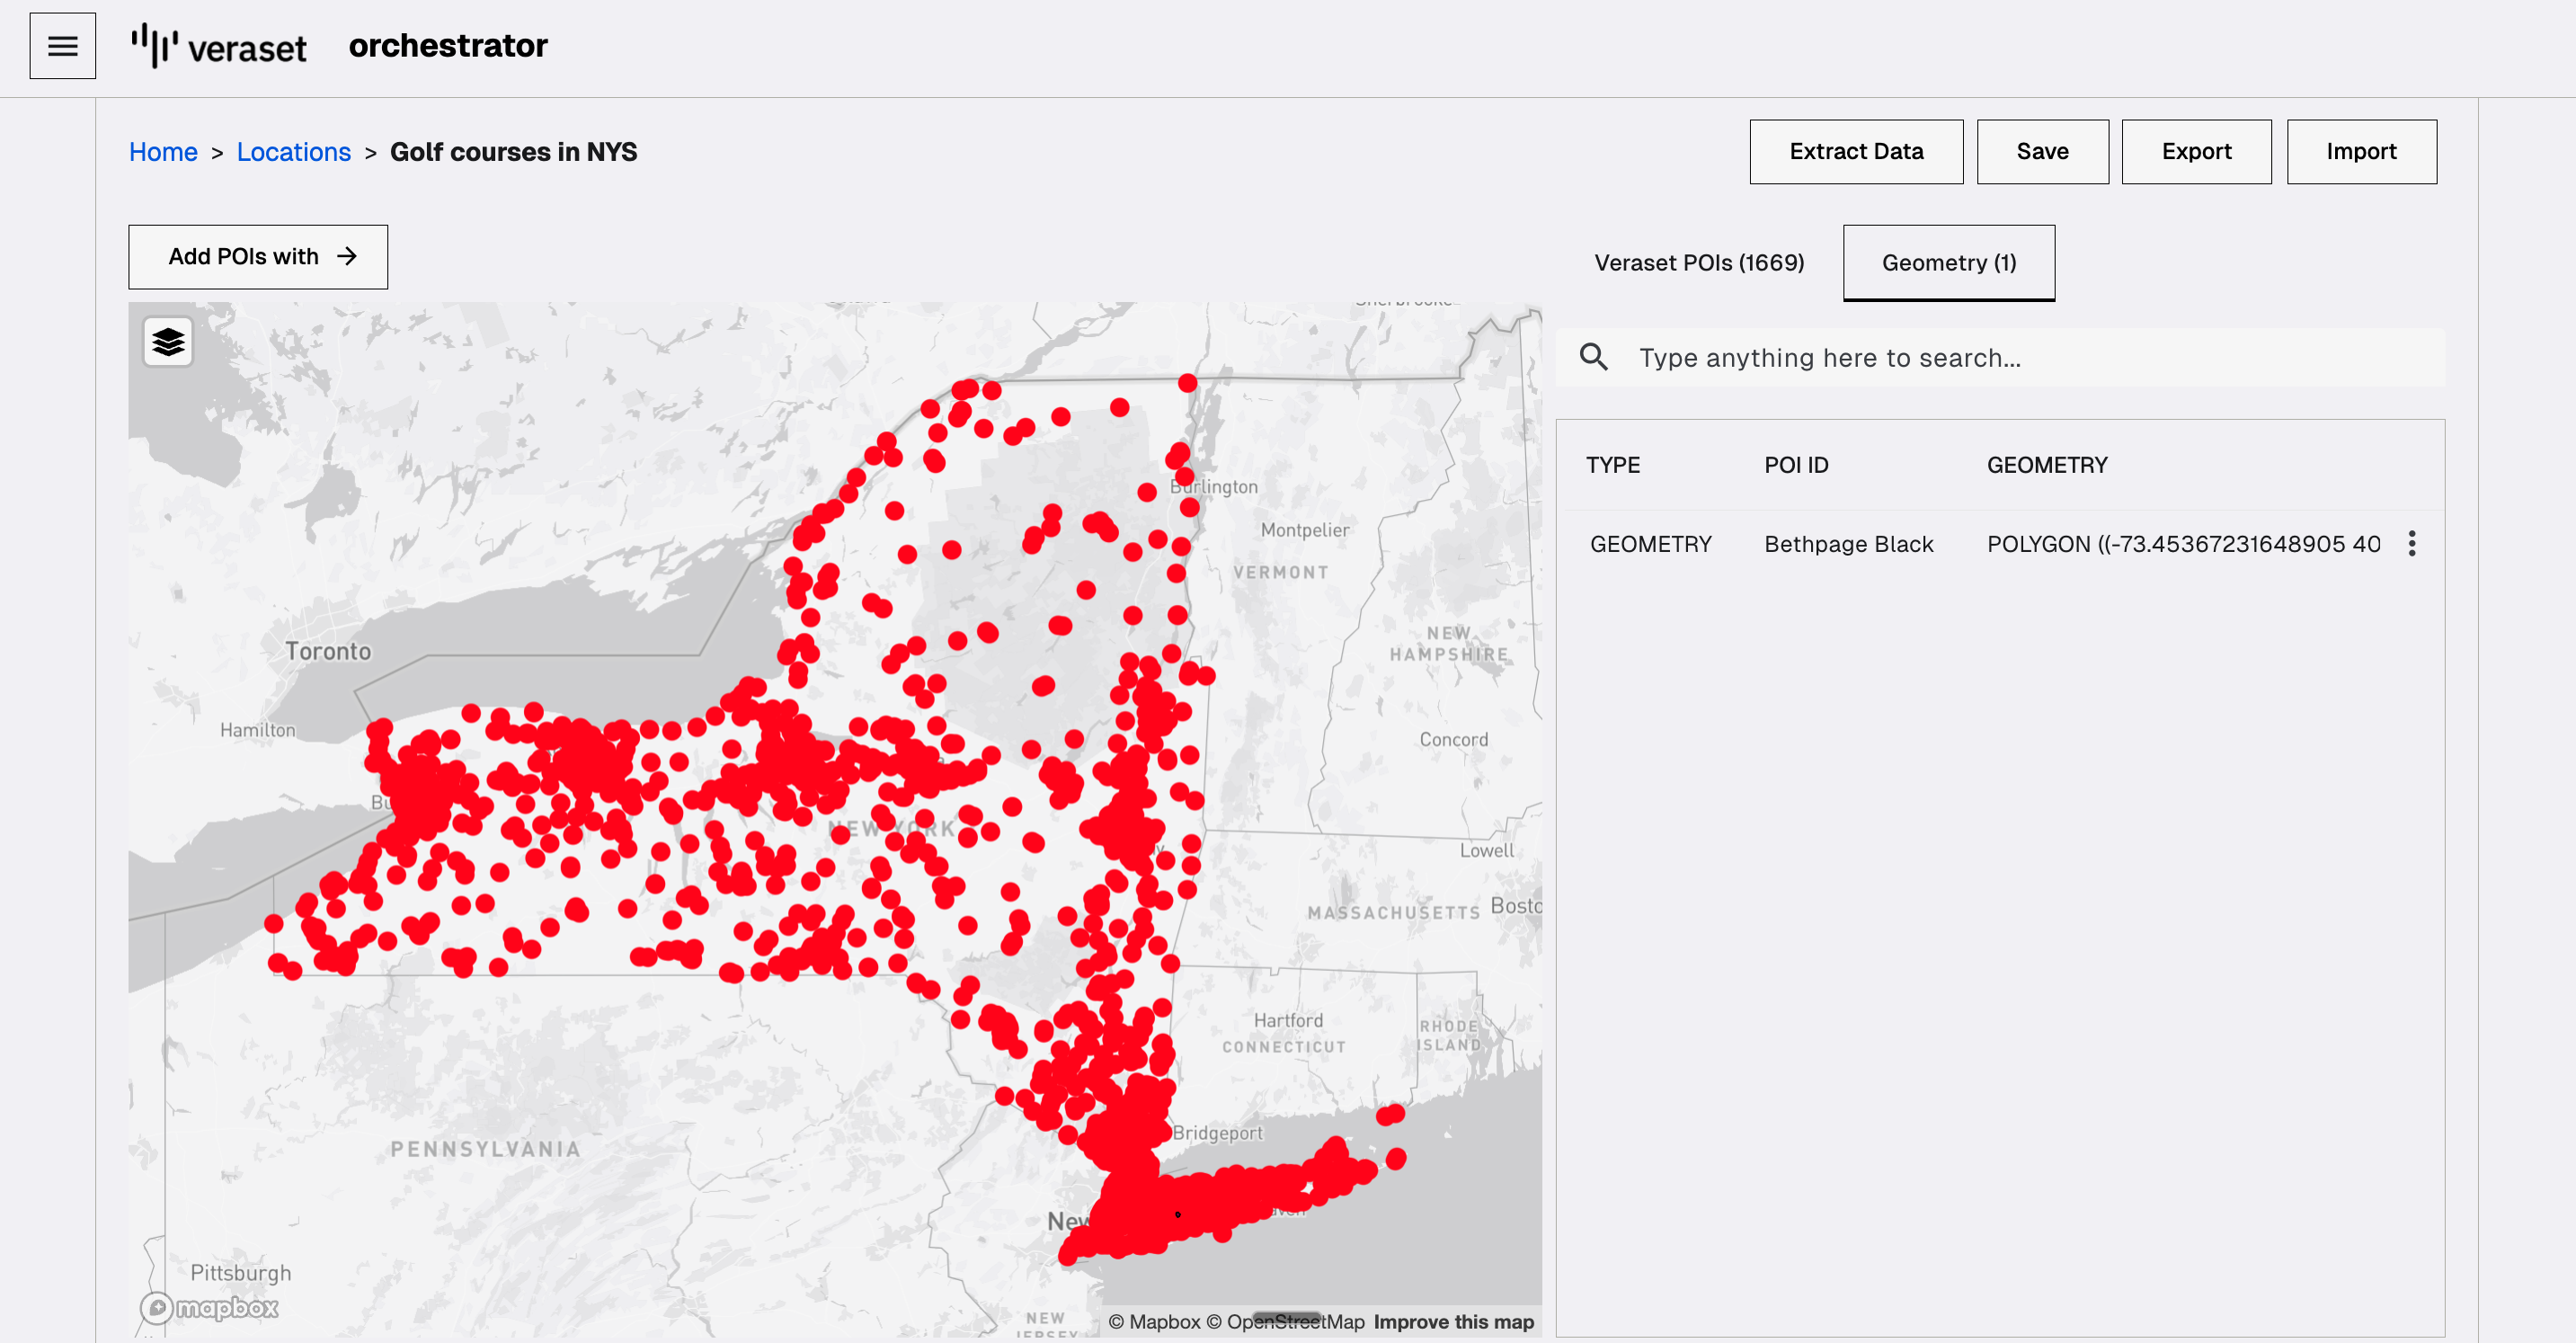
4. Method 3: Draw/WKT (Custom Polygons)
This method is for defining custom, non-standard geographic boundaries.

- Click Add POIs with and select Draw/WKT. This will open the Geometry Builder.
- Enter a POI ID (name) for your custom area (e.g., "Bethpage Black").
- Change the Type dropdown from GEO RADIUS to GEOMETRY.
- Use the Search bar to quickly navigate the map to your area of interest (e.g., search for a nearby road or address).
- Click the Drawing Tool icon (a polygon shape) on the right.
- Click around the perimeter of the area you want to define. Each click places a dot, and the lines connect to form a polygon.
- The corresponding WKT String will be generated in the input box.
- If you need to draw a second, separate area under the same POI ID, click the drawing tool again.
- To remove a drawn area, select it on the map and click the Delete icon next to the WKT string.
- Click Confirm to add the custom geometry to your Location Group.
5. Saving and Next Steps
Once you have added all your desired POIs:
- Click the Save button in the upper right-hand corner.
- In the Save Location popup, enter a Name for your Location Group (e.g., "Florida Golf Courses").
- Click Confirm.
Your Location Group is now saved! You can immediately begin a data extraction on it by clicking the Extract Data button.
Would you like to review the steps for one of the methods, or perhaps learn about how to run a data extraction on a saved Location Group?

